
So several people have asked the procedure for doing this so I thought I would write up what I did, and how it worked for me. This was NOT an intuitive process, but after a few hours and lots of searching I got it working. I will include in this how I trained my Global Cache iTach device, how I set that device up in Homeseer, how I got Homeseer to send out the commands, and how to put those commands to use in HSTouch.
OK, so the first thing you have to do here is to learn the IR codes you want to use into your Global Cache device. This process is described very well in the short tutorial site that Global Cache has put up here: http://www.globalcache.com/support/ilearntutorial/ so once you have read that you should be good to go on learning commands into your device.
So, once you have learned your commands you are ready to import and to use them in Homeseer. The easiest way to get your commands into Homeseer (OK, there is no easy way, but this way works) is to use the New File button in iLearn to drop all the stored commands out to a text file. Here is a sample of 4 codes cut right out of my text file:
[ON] sendir,1:1,1,38109,1,1,343,171,22,63,22,63,22,63,22,21,22,21 ,22,21,22,21,22,63,22,21,22,21,22,63,22,63,22,63,22,63,22,63 ,22,21,22,63,22,21,22,63,22,21,22,21,22,63,22,21,22,21,22,21 ,22,63,22,21,22,63,22,63,22,21,22,63,22,63
[OFF] sendir,1:3,1,38109,1,1,343,171,22,63,22,63,22,63,22,21,22,21 ,22,21,22,21,22,63,22,21,22,21,22,63,22,63,22,63,22,63,22,63 ,22,21,22,21,22,21,22,21,22,63,22,21,22,21,22,63,22,63,22,63 ,22,63,22,63,22,21,22,63,22,63,22,21,22,2111
[VOL UP] sendir,1:3,1,38109,1,1,343,171,22,63,22,63,22,63,22,21,22,21 ,22,21,22,21,22,63,22,21,22,21,22,63,22,63,22,63,22,63,22,63 ,22,21,22,21,22,21,22,21,22,63,22,21,22,21,22,21,22,63,22,63 ,22,63,22,63,22,21,22,63,22,63,22,63,22,21
[VOL DOWN] sendir,1:3,1,38109,1,1,343,171,22,63,22,63,22,63,22,21,22,21 ,22,21,22,21,22,63,22,21,22,21,22,63,22,63,22,63,22,63,22,63 ,22,21,22,21,22,21,22,63,22,63,22,21,22,21,22,21,22,63,22,63 ,22,63,22,21,22,21,22,63,22,63,22,63,22
So keep this text file handy, we will need it shortly.
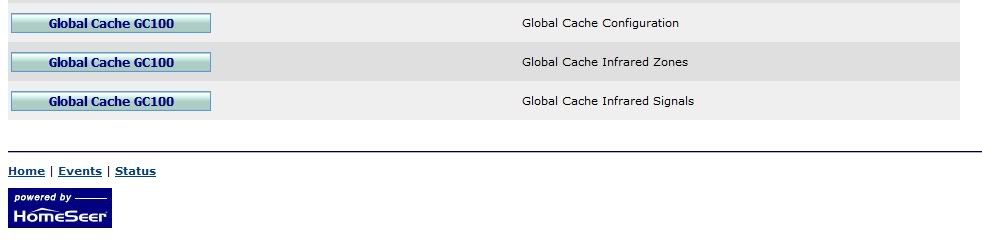
Now we need to start configuring things in Homeseer. First off, in Homeseer if you do not already have the GC100 PlugIn installed, install it through the Updater. Once it is installed you will need to enable it. Do this by going to Setup, then Interfaces and you should see the Global Cache GC100 under PlugIns. Enable both Infrared and Other sections and click Save. Once this was done I had to restart Homeseer. When it came back up I clicked on Plugins page (If you do not see one of those enable it by going to (Setup, Web Site and changing the drop down box by PlugIns to Yes). Here you will see three menu items for the Global Cache devices and we have things to do in each one.
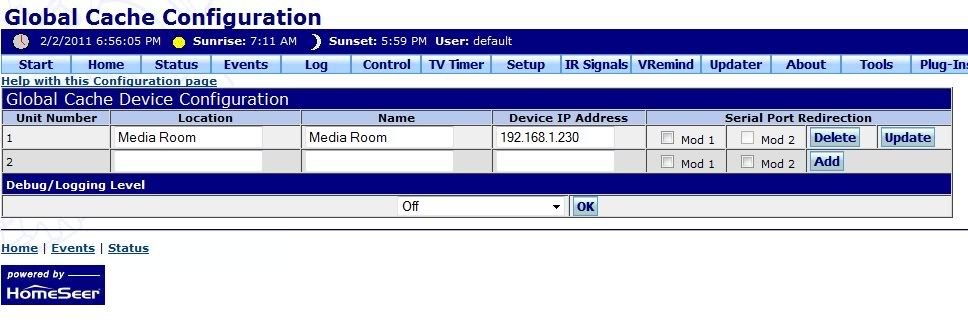
First click on the Global Cache Configuration link and fill in the information for your unit. The location and name are whatever you want them to be, then just put in the IP address of your unit and click Add.
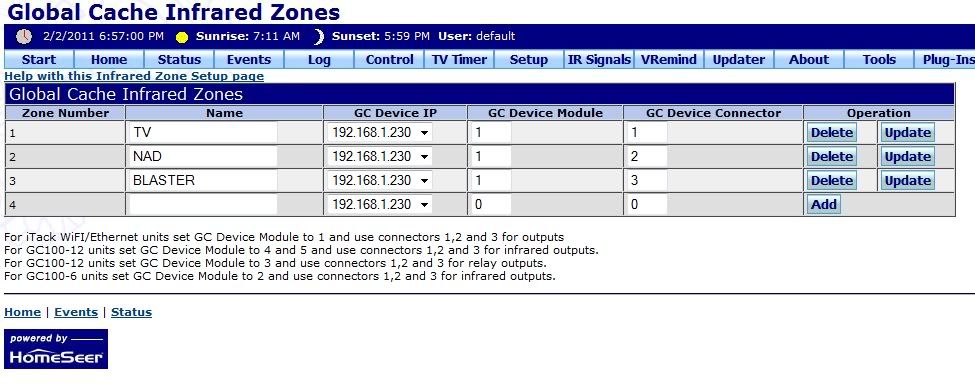
Next go to the Infrared Zones tab. This is where you define names for the different output zones on your unit. There is a legend at the bottom of the screen to help you figure out what device module and connectors you should use. For mine, the iTach, I used device module 1 and connector 1 for the first IR out, connector 2 for the second IR out and connector 3 for the IR blaster or third IR out. I then named each zone number to correspond to the device that I wanted that output to control. Then you just select the IP address of the unit you are configuring the ports for and click Add. So as you can see in the pic below I use output connector 1 to control my TV, output connector 2 to control my receiver and the IR blaster to control everything else.
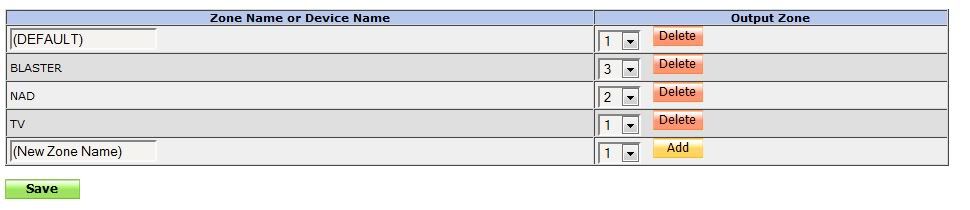
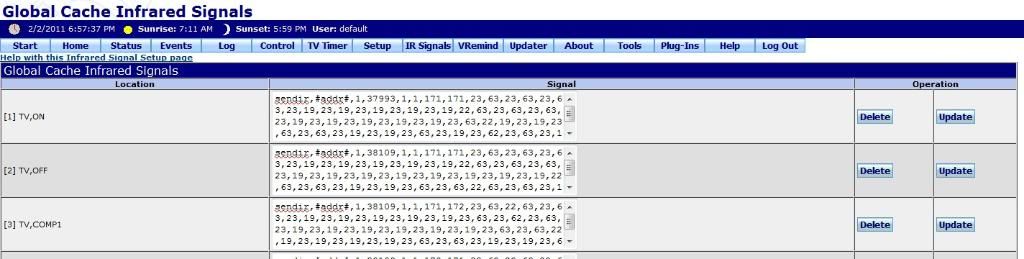
The next thing we will do is add all the Infrared Signal device mappings. To do this go to Tools and click Infrared Signals. The first thing to do is go to the bottom of the screen and configure the Output Zones. This configuration will match the configuration that you did for the Zones on the GC plugin, so you will type in the name of the device you want to control and the corresponding zone number from the drop down list to match the GC plugin and click Add.
Compare the picture below with the GC Zone pic above for an example.
OK, so the first thing you have to do here is to learn the IR codes you want to use into your Global Cache device. This process is described very well in the short tutorial site that Global Cache has put up here: http://www.globalcache.com/support/ilearntutorial/ so once you have read that you should be good to go on learning commands into your device.
So, once you have learned your commands you are ready to import and to use them in Homeseer. The easiest way to get your commands into Homeseer (OK, there is no easy way, but this way works) is to use the New File button in iLearn to drop all the stored commands out to a text file. Here is a sample of 4 codes cut right out of my text file:
[ON] sendir,1:1,1,38109,1,1,343,171,22,63,22,63,22,63,22,21,22,21 ,22,21,22,21,22,63,22,21,22,21,22,63,22,63,22,63,22,63,22,63 ,22,21,22,63,22,21,22,63,22,21,22,21,22,63,22,21,22,21,22,21 ,22,63,22,21,22,63,22,63,22,21,22,63,22,63
[OFF] sendir,1:3,1,38109,1,1,343,171,22,63,22,63,22,63,22,21,22,21 ,22,21,22,21,22,63,22,21,22,21,22,63,22,63,22,63,22,63,22,63 ,22,21,22,21,22,21,22,21,22,63,22,21,22,21,22,63,22,63,22,63 ,22,63,22,63,22,21,22,63,22,63,22,21,22,2111
[VOL UP] sendir,1:3,1,38109,1,1,343,171,22,63,22,63,22,63,22,21,22,21 ,22,21,22,21,22,63,22,21,22,21,22,63,22,63,22,63,22,63,22,63 ,22,21,22,21,22,21,22,21,22,63,22,21,22,21,22,21,22,63,22,63 ,22,63,22,63,22,21,22,63,22,63,22,63,22,21
[VOL DOWN] sendir,1:3,1,38109,1,1,343,171,22,63,22,63,22,63,22,21,22,21 ,22,21,22,21,22,63,22,21,22,21,22,63,22,63,22,63,22,63,22,63 ,22,21,22,21,22,21,22,63,22,63,22,21,22,21,22,21,22,63,22,63 ,22,63,22,21,22,21,22,63,22,63,22,63,22
So keep this text file handy, we will need it shortly.
Now we need to start configuring things in Homeseer. First off, in Homeseer if you do not already have the GC100 PlugIn installed, install it through the Updater. Once it is installed you will need to enable it. Do this by going to Setup, then Interfaces and you should see the Global Cache GC100 under PlugIns. Enable both Infrared and Other sections and click Save. Once this was done I had to restart Homeseer. When it came back up I clicked on Plugins page (If you do not see one of those enable it by going to (Setup, Web Site and changing the drop down box by PlugIns to Yes). Here you will see three menu items for the Global Cache devices and we have things to do in each one.
First click on the Global Cache Configuration link and fill in the information for your unit. The location and name are whatever you want them to be, then just put in the IP address of your unit and click Add.
Next go to the Infrared Zones tab. This is where you define names for the different output zones on your unit. There is a legend at the bottom of the screen to help you figure out what device module and connectors you should use. For mine, the iTach, I used device module 1 and connector 1 for the first IR out, connector 2 for the second IR out and connector 3 for the IR blaster or third IR out. I then named each zone number to correspond to the device that I wanted that output to control. Then you just select the IP address of the unit you are configuring the ports for and click Add. So as you can see in the pic below I use output connector 1 to control my TV, output connector 2 to control my receiver and the IR blaster to control everything else.
The next thing we will do is add all the Infrared Signal device mappings. To do this go to Tools and click Infrared Signals. The first thing to do is go to the bottom of the screen and configure the Output Zones. This configuration will match the configuration that you did for the Zones on the GC plugin, so you will type in the name of the device you want to control and the corresponding zone number from the drop down list to match the GC plugin and click Add.
Compare the picture below with the GC Zone pic above for an example.

Comment